We use cookies to give you the best experience on our website. These cookies are completely safe and secure and will never contain any sensitive information. Please read our Privacy Policy. By clicking "Ok" or clicking on any other content, you agree that cookies can be placed.
Making a Seed Mosaic
Introduction
As diverse as the plant kingdom, seeds exist in all shapes, sizes, and colors. They can be spotted, speckled, striped and striated; curled, flat, round and elongated; bumpy or rough to smooth and shiny. Have your kids look at a variety of different seeds and ask them these questions. What color is it? What shape is it? How big is it (measure with a rule)? What is its texture? Is it soft or is it hard? Do you think it is pretty? Seeds offer a wonder of artistic possibilities and they are ideal for the craft of mosaic-making.
Mosaics are carefully placed pieces of material, traditionally stone, glass and bits of metal, arranged to make an image or design. Replace those bits of stone, glass or metal with seeds and you have a seed mosaic. Form a round mosaic and you have a seed mosaic medallion!
What you need:
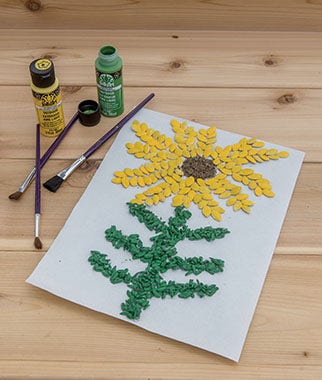
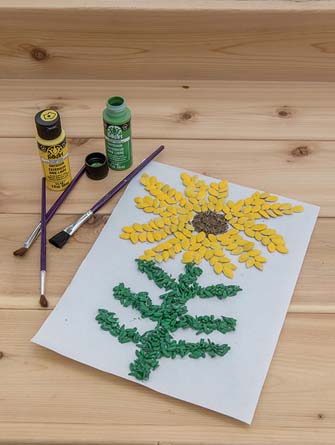
•Pumpkin seeds in different sizes. Try ‘Big Max’ (large), ‘Early Sweet Sugar Pie’ (medium) and ‘Jack Be Little’ (small).
• Elmer’s glue
• Flexible container lids from a yogurt container or coffee can
• Non-toxic paint
• Q-tips
More advanced mosaic-makers might want to use more diverse seeds such as ‘Scarlet Runner’ pole bean, ‘Filet Fin Des Bagnols’ bush bean, ‘Fortex’ pole bean, ‘Triomphe de Farcy’ bush bean, ‘Burpee’s Tenderpod’ bush bean, ‘Italian Rose’ bean, ‘Dragon’s Tongue Wax’ bush bean, ‘Cherokee Trail of Tears’ bean, ‘Painted Pony’ bean and ‘Stop’ bush bean.
Instructions:
- Pre-paint your pumpkin seeds. Have your child mix his/her favorite colors and dab the paint onto each seed with a q-tip. Lay painted seeds on a recycled plastic bag to dry. Seeds can be all one color or multiple colors. Do a mix of large seeds and small seeds to make a more interesting mosaic. Parents beware: younger mosaic-makers may skip the q-tip and just use their hands! Select a non-toxic paint should this happen. Let seeds dry for an hour.
- Fill your flexible container lid with Elmer’s glue. Let it sit for 10 to 15 minutes.
Gather dry seeds and lay them into the glue in any pattern. Seeds do not need to be covered in glue, just well seated. Make a flower or an abstract design, it’s all art, one way or another! Set the finished design on a flat surface. While the glue sets, the design may “drift” a little. Gently nudge seeds into place until they stop drifting. Let the seed mosaic medallion dry until the glue is clear, about 5 to 10 days. - When the glue is complete dry, gently remove your mosaic from the container lid and add any finishing details you desire. Your medallion can hang in a window, grace a table or adorn a home-made purse.