Garden tools are an essential part of a well-maintained garden, but did you know maintaining those tools is also vital to successful growing? Working with clean, sharpened tools will help keep your plants healthy, and it will make your garden work easier and more efficient. These simple tips on how to clean garden tools and protect them will keep your tools working hard for years to come.
1. Keep Them Clean
Taking a few minutes to clean off your garden tools each time you use them can go a long way to ensuring their lifespan. After each use, give your tools a quick rinse with a strong stream of water to remove dirt. For caked-on soil, use a putty knife to help knock it loose. Once you've rinsed them clean, it's essential to dry off your tools before putting them away to prevent rusting.
During the height of the spring and summer growing seasons, chances are your garden tools are getting a regular workout. If you want to make tool cleaning faster and easier, set up a quick cleaning bucket by filling a large utility bucket with sand and mixing in 1 cup of vegetable oil. At the end of the day, stick your tools into the sand to remove any dirt and protect the finish.
If you're packing away your tools for the season, give them a complete cleaning to ensure they'll be in peak condition when you're ready to put them to work again. After removing dirt, sap or rust, and disinfecting, soak the tools in hot water and dish soap. Rinse them clean, and dry them thoroughly.
2. Disinfect to Protect
In some instances, your tools might need a little more than a simple cleaning. When you're caring for plants with fungal issues or infestations, it's important to disinfect your tools to prevent spreading disease to your other plants. For a quick fix, wipe down garden clippers and other tools with an ethanol or isopropyl alcohol wipe. For larger tools like shears and shovels, soak them in a bucket of diluted bleach after removing any dirt. Use a 10% dilution (1 part bleach to 9 parts water) and soak them for half an hour.
3. Remove the Rust
Rust will corrode the metal parts of your tools, wearing them down and making them dull over time. If your tools have collected any rust, you can scrub it away. First, clean the tools to remove any dirt, then use fine steel wool or a wire brush to remove the rust. The best way to prevent rust from forming in the first place is with proper garden storage. Keep your tools inside and away from moisture and other elements that can lead to rusting.
4. Don't Stick With Sap
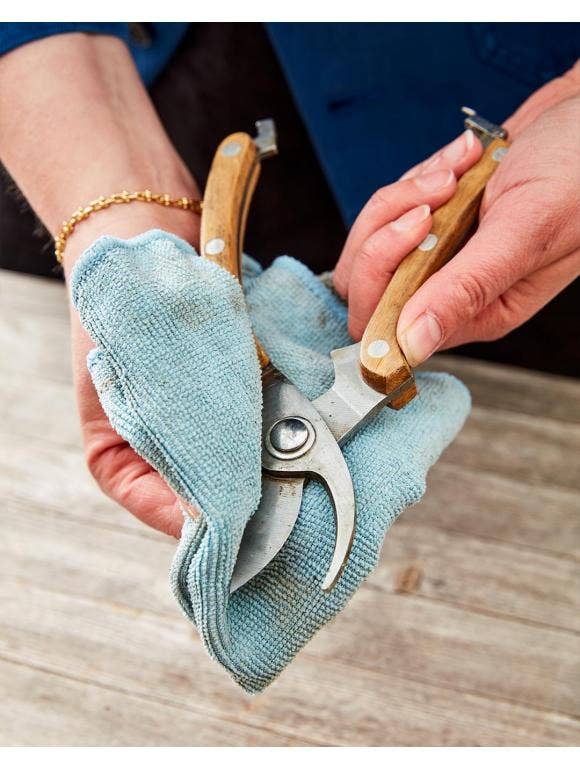
It's important to remove any sticky sap collected on tool blades to keep your garden shears or pruners working effectively and to ensure a clean cut. Dip a clean rag into some turpentine or paint thinner, then wipe the sap away.
5. Give Tools an Oiling
Giving your tools an oil treatment can help prevent rusting, keep moving parts running smoothly, and avoid drying and cracking wood handles. Using a rag, rub on some vegetable oil, linseed oil or any garden tool lubricant to give them a protective coating and prevent drying and rusting.
6. Store Your Tools Properly
Keeping your tools stored can prevent rusting and other wear and tear caused by exposure to elements like moisture and heat. Whether you have a dedicated tool shed or a simple tote, there are many garden storage options to fit your needs and tools. Using a handy tool bucket or tote throughout the growing season can keep your tools accessible and safe. Consider a more secure option for the winter months, especially for larger tools like shovels, rakes and shears.
When It's Time to Say Goodbye
No matter how well you care for your garden tools, they can become dull and worn down over time. Aging garden tools can cause more work for you as they'll become less efficient, like clippers that no longer give a clean cut. Some signs that it might be time for new garden tools are dull blades, mechanisms that stick even after oiling, rust that can't be removed, deteriorating metal, and cracked or brittle wood or plastic parts.
With a bit of TLC and these tips on how to clean garden tools, your tool shed will support your thriving garden and assist you for many growing seasons to come.
Browse Burpee's tool selection if you need to replace any of your favorite garden tools.

Written by Shahrzad Warkentin
Shahrzad Warkentin is a writer and seasoned gardener, with over 12 years of experience. Besides her own home garden, she helps manage her kids' school garden.