We use cookies to give you the best experience on our website. These cookies are completely safe and secure and will never contain any sensitive information. Please read our Privacy Policy. By clicking "Ok" or clicking on any other content, you agree that cookies can be placed.
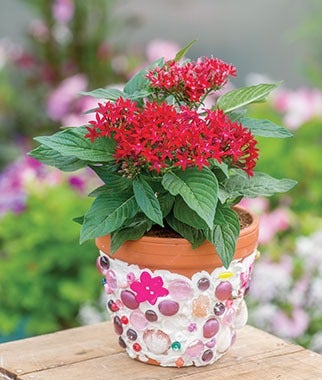
Memory Mosaic Pot
Introduction
Memory mosaics have been used to remember events throughout the ages. If you want to remember a summer event, a Memory Pot is a lovely way to do this. It is also a great way to display small found treasures rather than keep them in a drawer or box.
________________________________________________________________________________________
What You Need:
- Small clay pot, such as a 6 inch pot.
- Non-toxic latex tile grout or Thin-set (this is available at the hardware store).
- A plastic knife or craft stick to spread the grout.
- Small objects for the mosaic such as shells, pebbles, beads, charms, beach glass, buttons or old jewelry.
- Soft cloth or towel to clean up the pot.
________________________________________________________________________________________
What To Do:
- Make sure you have a craft mat or something to protect your work surface, this can be a messy project.
- Spread your objects out and think of how you would like to arrange them. Remember that once the objects are in the mosaic they cannot be moved.
- Use your knife to spread a small amount of grout onto the outside of the pot. Work on one small area at a time as the grout dries quickly. If you are using Thin-set follow the directions, mixing a small amount at a time. It should have the consistency of peanut butter.
- Press your objects into the grout. They should stick quickly.
- Move to the next section of the pot and continue.
- Allow the pot to dry overnight.
- Wipe the pot clean with a damp cloth to remove any grout residue.
- Plant a plant in your memory pot!